
As many long-time Final Cut Pro users give Avid Media Composer a new look, we’ve gotten numerous inquiries about the best workflow for going from HDV or AVCHD to Avid. Because it’s a common question, we thought a blog post might help clear things up.
Much like Final Cut Pro, Avid is happiest when editing a native, edit-ready format. Instead of ProRes, Avid uses a format called DNxHD. DNxHD supports a variety of bitrates, and delivers high quality with low cpu requirements.
For most ClipWrap users, particularly those with AVCHD cameras, transcoding to DNxHD 145 is the best option. While Avid does provide a low bitrate DNxHD36 option, it’s only suitable for a narrow set of framerates and resolutions. DNxHD220 won’t deliver noticeably better quality with pre-compressed content like AVCHD and HDV.
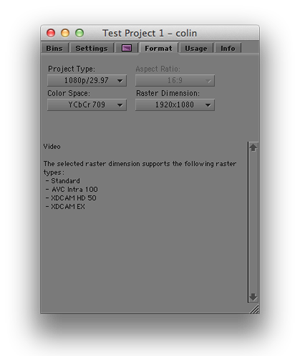
Once you’ve transcoded your footage, you’ll need to import it into Avid. This is where users can face some confusion. It’s important that you have the format for your project set correctly before you import any footage. That means choosing 1080 or 720 resolution, as well as either interlaced or progressive. You’ll also want to be sure your project is set to the correct colorspace – almost always YCbCr.
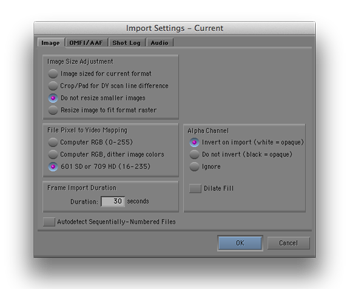
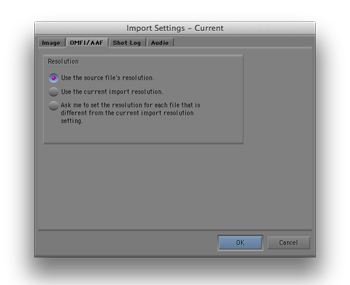
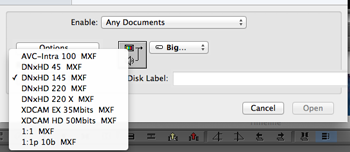
Next, when you bring up the import dialog, click the options button to confirm your import settings. Make sure your “file pixel to video mapping” setting is set to “601 SD or 709 HD” and that the “image size adjustment” is set to “Do not resize.” On the OMFI/AAF tab, select “use the source file’s resolution.” Click ok, and then confirm that the resolution dropdown is set to DNxHD 145. Now browse to your file and click open.
If the import dialog doesn’t say “fast importing video,” something has gone wrong, and Avid is retranscoding your video. Make sure you haven’t missed any of the above steps – the most common issue is incorrect interlaced/progressive settings. If you’re still having trouble, get in touch.